Flutter applications are incredibly excellent. It is quite easy and proficient to build applications in Flutter. Here we are going to explore one of the best features of Flutte theme mode. Usually, any application has 3 modes of theme, Light mode, Dark Mode and System Mode. Flutter has a default support for that but the complexity is how to change theme mode in Flutter. If we change theme mode, should it be saved so that when I open the app next time it opens the app in my last saved mode? We will explore all things here.
To store the record in the secure store for later use we can use any secure storage package for that such as shared_preferences or flutter_secure_storage. These packages are to persist the data in the internal storage so after closing the app if we open the app again we can get those stored data.
There are other packages that we need to use to manage the states. For demonstration purposes, we are using the default flutter ValueChangeNotifier. You can use any stage management package such as Riverpod, Providers, or Bloc.
Setup Flutter Project
Run the following command in your directory where you want to set the Flutter project
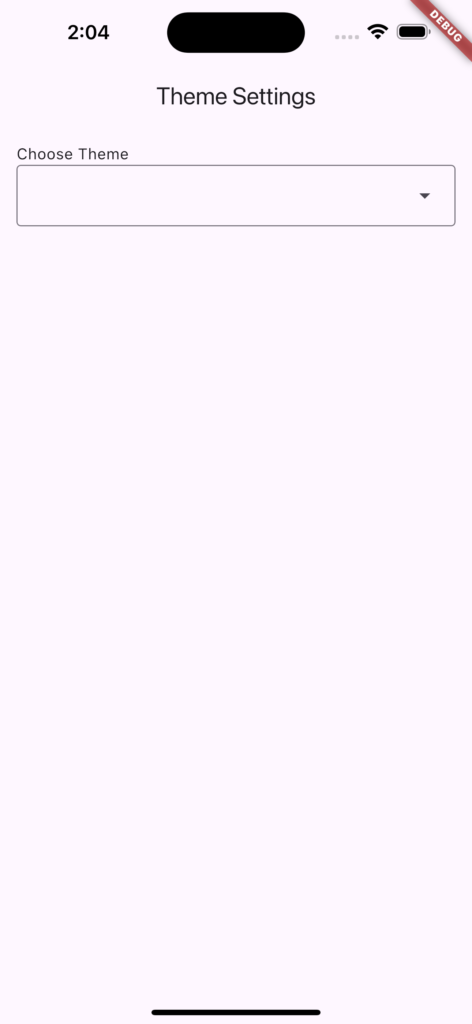
flutter create theme-change-exampleCreate a screen for changing the theme for project. We have created a screen ThemeSettings. That includes a dropdown which listed all the possible theme modes.
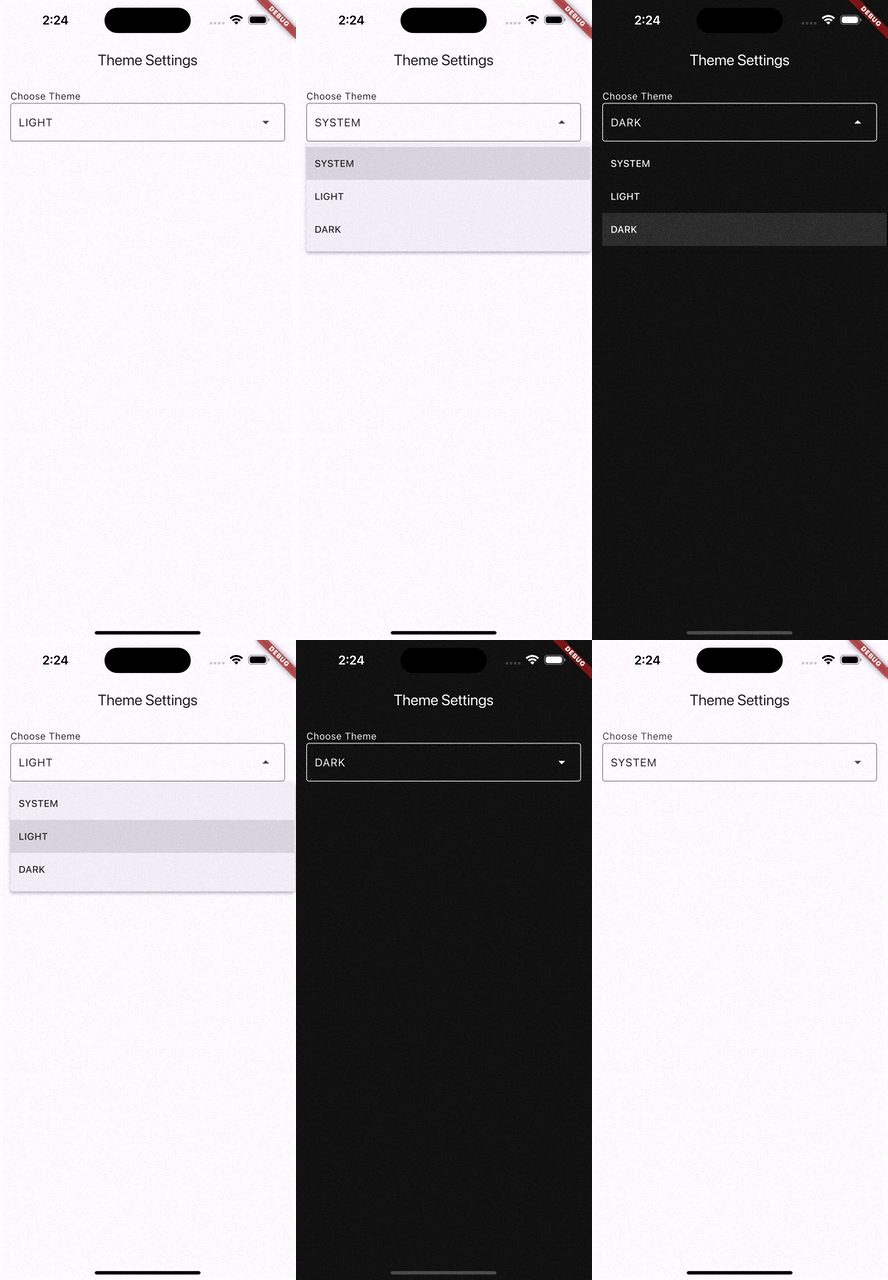
There are three theme modes in flutter:
- ThemeMode.system: This mode will set the theme according to system.
- ThemeMode.dark: This will set the theme mode with dark theme.
- ThemeMode.light: This will set the theme mode in light mode.
We need to render the list in dropdown, for that we will create a list as follows:
List<String> themeList = ThemeMode.values.map((e) => e.name).toList();Here is code of initial screen setup and a dropdown on screen.
import 'package:flutter/material.dart';

void main() {
  runApp(const ThemeChangeExample());
}

class ThemeChangeExample extends StatefulWidget {
  const ThemeChangeExample({super.key});
  @override
  State<ThemeChangeExample> createState() {
    return _ThemeChangeExampleState();
  }
}

class _ThemeChangeExampleState extends State<ThemeChangeExample> {
  @override
  Widget build(BuildContext context) {
    return const MaterialApp(
      home: ThemeSettings(),
    );
  }
}

class ThemeSettings extends StatefulWidget {
  const ThemeSettings({super.key});

  @override
  State<ThemeSettings> createState() => _ThemeSettingsState();
}

List<String> themeList = ThemeMode.values.map((e) => e.name).toList();

class _ThemeSettingsState extends State<ThemeSettings> {
  @override
  Widget build(BuildContext context) {
    return Scaffold(
      appBar: AppBar(
        title: const Text("Theme Settings"),
      ),
      body: Container(
        padding: const EdgeInsets.all(15),
        child: Column(
          crossAxisAlignment: CrossAxisAlignment.start,
          children: [
            const Text("Choose Theme"),
            Column(
              children: [
                DropdownMenu(
                  width: double.infinity,
                  dropdownMenuEntries: themeList
                      .map<DropdownMenuEntry<String>>(
                        (String value) => DropdownMenuEntry(
                            value: value, label: value.toUpperCase()),
                      )
                      .toList(),
                ),
              ],
            ),
          ],
        ),
      ),
    );
  }
}H
In next step we need to observe the changing value of dropdown and update the app theme. We will use the onSelected property to change the theme. We have passed the value in parent widget but you can use any other state management system.
DropdownMenu(
  width: double.infinity,
  dropdownMenuEntries: themeList
      .map<DropdownMenuEntry<String>>(
        (String value) => DropdownMenuEntry(
            value: value, label: value.toUpperCase()),
      )
      .toList(),
  onSelected: (value) {
    // You can update these value in provider, Riverpod or any other state management tool.
    widget.onChangeTheme(value!);
  },
),Here is complete code to change theme mode in Flutter applications.
import 'package:flutter/material.dart';

void main() {
  runApp(const ThemeChangeExample());
}

class ThemeChangeExample extends StatefulWidget {
  const ThemeChangeExample({super.key});
  @override
  State<ThemeChangeExample> createState() {
    return _ThemeChangeExampleState();
  }
}

class _ThemeChangeExampleState extends State<ThemeChangeExample> {
  final ValueNotifier<ThemeMode> _theme =
      ValueNotifier<ThemeMode>(ThemeMode.system);
  @override
  Widget build(BuildContext context) {
    return ValueListenableBuilder<ThemeMode>(
      valueListenable: _theme,
      builder: (context, value, child) {
        return MaterialApp(
          home: ThemeSettings(
            onChangeTheme: (theme) {
              switch (theme) {
                case 'dark':
                  _theme.value = ThemeMode.dark;
                  break;
                case 'light':
                  _theme.value = ThemeMode.light;
                  break;
                default:
                  _theme.value = ThemeMode.system;
              }
            },
            currentTheme: value,
          ),
          themeMode: value,
          darkTheme: ThemeData(colorScheme: const ColorScheme.dark()),
        );
      },
    );
  }
}

class ThemeSettings extends StatefulWidget {
  final Function(String theme) onChangeTheme;
  final ThemeMode currentTheme;
  const ThemeSettings(
      {super.key, required this.onChangeTheme, required this.currentTheme});

  @override
  State<ThemeSettings> createState() => _ThemeSettingsState();
}

List<String> themeList = ThemeMode.values.map((e) => e.name).toList();

class _ThemeSettingsState extends State<ThemeSettings> {
  @override
  Widget build(BuildContext context) {
    return Scaffold(
      appBar: AppBar(
        title: const Text("Theme Settings"),
      ),
      body: Container(
        padding: const EdgeInsets.all(15),
        child: Column(
          crossAxisAlignment: CrossAxisAlignment.start,
          children: [
            const Text("Choose Theme"),
            Column(
              children: [
                DropdownMenu(
                  width: double.infinity,
                  initialSelection: widget.currentTheme.name,
                  onSelected: (value) {
                    widget.onChangeTheme(value!);
                  },
                  dropdownMenuEntries: themeList
                      .map<DropdownMenuEntry<String>>(
                        (String value) => DropdownMenuEntry(
                            value: value, label: value.toUpperCase()),
                      )
                      .toList(),
                ),
              ],
            ),
          ],
        ),
      ),
    );
  }
}
You can view the code on Github Repository.

If you want to learn more about how to setup theme in Flutter, you can check it out here.


